
Big thanks to Bumpaneer for allowing this technique to be written up as a tutorial. Let’s get started.
1. Set Up the Material
- Load up RenX and make a plane
10x10or bigger. This is only to get you started, once you learn this tutorial, you’ll be able to make water any size you wish. - Press M on your keyboard to open the Renegade Material Editor.
- Click the blue box icon (Make New Renegade Material) to avoid conflicts with a material already used on another object, then change the Pass Count to
2and select the Surface Type asNaturally Water.
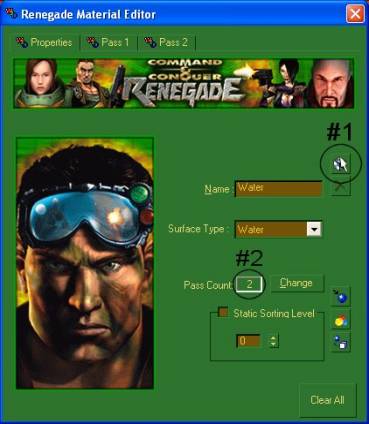
Ren-X tends to crash if you start on the Pass 1 tab, so move to the Pass 2 tab first — we’ll come back to Pass 1 afterward.
2. Configure Pass 2 (Reflection Layer)
On the Vertex Material tab:
- Make sure Ambient, Diffuse, Specular, and Emissive colors are all black.
- Under Stage 0 Mapping, set Type to
BumpEnvand fill in the Args box with:BumpScale=0.2 BumpRotation=0.3 VPerSec=-0.01 - Change the Stage 1 Mapping Type to
Environment(this makes it reflective).
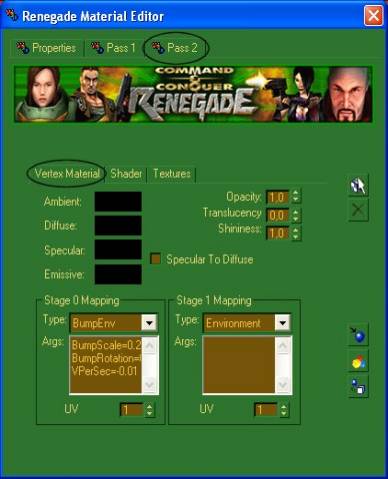
Next, move to the Shader tab (still on Pass 2):
- Set the Blend Mode to
Add. - Under Advanced, set Pri Gradient to
Bump-Environmentand Detail Color toAdd.
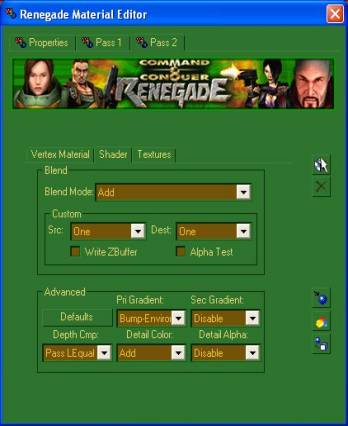
Now move to the Textures tab to set up the water’s textures and movement:
- Check Stage 0 Texture, click None, and select
bump_water.tga(or at MPF). - Check Stage 1 Texture (Detail Texture), click None, and select
water_reflect.tga(or at MPF).
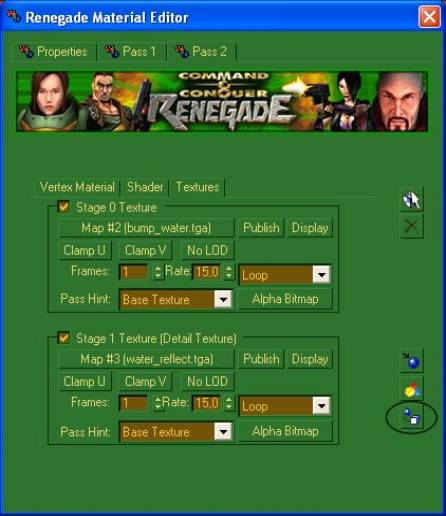
Once Vertex Material, Shader, and Textures are set up on Pass 2, click Assign Material to Selection to apply the changes to the object.
3. Configure Pass 1 (Surface Layer)
Go back to Pass 1. On the Vertex Material tab, change the Stage 0 Mapping Type to Linear Offset and add VPerSec=-0.01 to the Args box.
The Ambient, Diffuse, Specular, and Emissive values are already set up correctly here, so you don’t need to touch them.
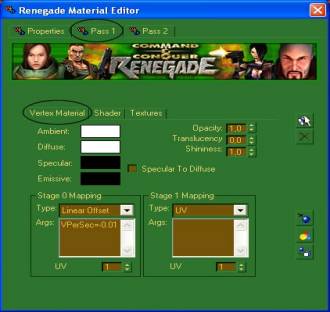
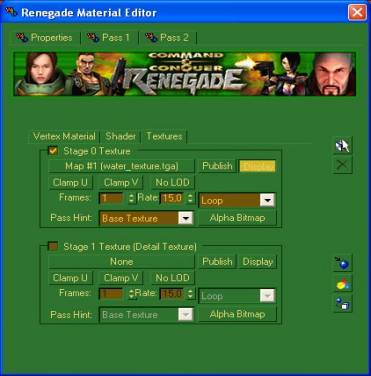
There’s nothing to change on the Shader tab for Pass 1, so move directly to the Textures tab:
- Check Stage 0 Texturing and select the remaining texture from the pack,
water_texture.tga(or at MPF). - Check Display, then click Assign Material to Selection once more to finish.
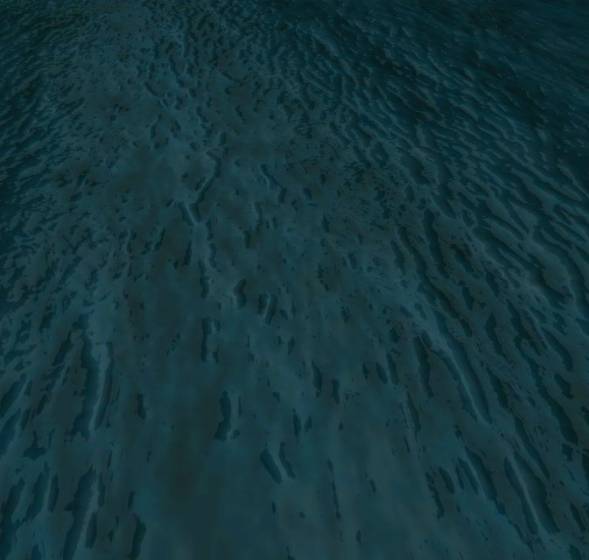
Finished Result
That’s it — enjoy your new realistic water.
If you want to build more realistic effects for Renegade, use WDump (included with the Renegade Mod Tools) to inspect any W3D’s texture settings, so you can duplicate any effect Westwood used on their own maps.
Realistic Water technique developed and improved by Bumpaneer and StoneRook. Tutorial written by André.